
 Hi everyone. I receive a lot of emails from stitchers about finishing the pear designs, so today I snapped a few while doing the latest. Lots of boring photos in this post. First off, here it is - pattern needs tweaked a little and I will post it this weekend.
I use the template that I originally posted with the first pear, on a bright color cardstock (so I can locate it). Whether it be square or shaped, I always fold my templates to make sure they are the same each side, and then mark the fold in black. Depending on the pear size, I resize it on the copier. After fusing the interfacing to the linen and the backing fabric, I hold the linen up to a window with the template on the backside.
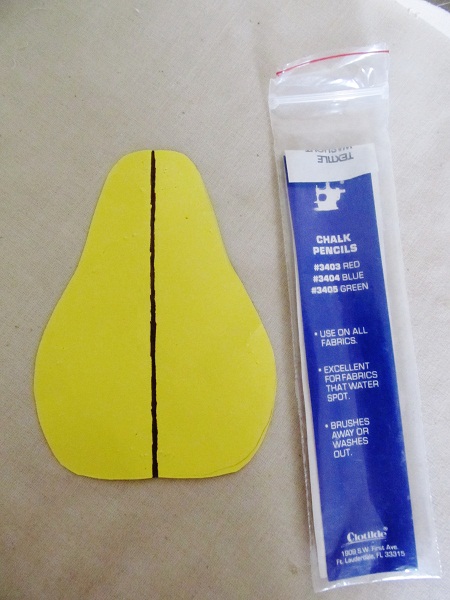

You can see the center line through the linen which helps a lot. Two pins to hold it, and then I use a chalk pencil to outline right onto the interfacing. This is NOT the cut line, but the stitching guide. Some times I go a little over since I can always go back to make it a little smaller. I always use basting 8-10 stitches/inch to make it easier to remove if necessary and it holds with the interfacing very well.


Turn it right side out to check the shape and then either sew it in further or remove the stitching to make it larger (that has never happened), or hopefully be perfectly pleased and no changes are needed! Clip the seams and trim the excess fabric.


The bottom is folded and pressed as is the seam to open it. I use a plastic letter opener to crisp the seams by sliding it between the backing and the seam allowance, never on the linen side.


A smaller piece of cardstock is inserted (so the batting slides easily) and after cutting the batting smaller than the original template, slid inside to fit the shape. If I use Mylar to hold the shape, it's cut slightly smaller than the pear and kept in. For a flatter pear, one layer of the thickest batt, but usually it's two, one on each side of the paper. It's easy to insert the stem between the batting through the top opening now, while the paper is separating the two. Remove the paper and fold the fabrics over the batting.

The bottom is usually wonky and I open the seam where necessary and hand stitch or glue to shape and close. A little strip of additional batting is sometimes needed here. Done.
 I'm sorry I haven't been reading blogs or responding to comments. I have so much going on right now and my head is spinning, unfortunately in the opposite direction that I would like. When I was getting quotes for home owner's insurance, I told the agent that we are classed as a Type 2 alarm system. She asked what we have - I replied a menopausal woman with a gun. She laughed so hard she snorted. I wasn't kidding. The moods are raging!!!!
The chart for this will be posted in a few days and until then, stay safe, have happy thoughts, fabulous food, and good stitching!
Thank you for visiting!
