May 14, 2012

Lydia has a home, small Scottish sampler

Hello everyone.   It has not been a good week and this is just a quick post to show you two projects that I've sewn into pillows or ornaments or whatever the heck they should be called.   I'm making progress on Lucy and continuing with errors that have become the norm with this project.  I still love her.  I'll show her when it's complete.    This is Lydia Hinckley finished.
She is hung over a pretty large basket that I purchased recently at James Creek.  I also visited another shop that I love, The Olde English Shoppe, which I am afraid is closing.  Their place is fabulous, prices too high, but their buyer brings in some unique pieces.  I heard another shop in Boardman Ohio that I didn't even know existed, closed two weeks ago.   The basket is from Ragon House Collection, painted, and very stiff, but it's large and only $20.
The second finish is a sweet little delight with some over one stitching.  I used my standard 28 count and it would be very tiny on a high count linen.  Because of its size, it looked lost on this basket so I moved it to a cupboard and chose Lydia instead.


This design is older from Chessie and Me but still available.
I purchased a few new charts and when things get better I will show my new stash.  Oh.  One more thing.  I got a lovely letter from Barbara Blundell who stitched my last freebie (memorial) for a friend who had just lost her father.  If you would like to see Barbara's finish for her friend, visit Aimetu's Stitching.  She did a lovely job and it's the first time I saw this chart stitched ~  it looks as I imagined it when charting.  Barbara wrote that she will post her own photo of her finish to her blog later this week, and I want to thank her for writing and showing her work.
That's about it.  Hope you had a great weekend and all the Moms had a wonderfully special day!
Stay safe, talk to you soon. 
Thanks for visiting.

May 8, 2012

Lucy, cats, and dyeing to change

Hi everyone.   Ever since I did the sampler bag on my persimmon linen, I've been moving it.  This is certainly not unusual, but this particular piece was not sitting well with me.  I hate it.  There.  I said it.   An offering would probably not garner many entries, so I figured, what the hell.  Dye it.  I've never dipped a completed piece!  What would happen?  The floss obviously would accept the dye very well and end up the same color, but I didn't like it anyway so I dipped.  Because of the orange/red in the fabric, I used green with a touch of black. This color showed very nicely on the open blister in the palm of my hand, plus all the loose skin and blisters on my right hand from a  bad burn.  No, it wasn't fire, it was boiling water.  So my cuticles, wrinkles, blisters, and peeling skin are a very dark green, but it was well worth it.

 I'm surprised and happy with the result.
As for Lucy, I'm still making so many errors it's becoming ridiculous.  You can see in the photo that both lines start with "that mercy" so naturally, I reversed them and had to remove and start over.  Along with the front windows and door on the house.  But I'm continuing and will finish the lettering tonight.  Tomorrow I hope to get the second house outlined.  My sister is having cataract surgery Thursday and I can fill in the houses and roofs while I'm there.  You have to appear 2 hours before surgery, then wait another hour because they are never on schedule, then another hour before going home so I should get quite a bit completed.  Their cafeteria and coffee shop has decided to only have "healthy" items so I could have decaf black coffee with lettuce on the side, not my usual cappuccino.  Bad news - there is a pharmacy across the street that has Bliss chocolate on sale and I have a coupon.  I may buy a bag and take it into the eating area and see if they arrest me.  This won't be pretty. 
We had a bad storm last night that flooded our yard, and the hail looked like it was from an ice cube tray.  Really big, and enough to tear the leaves on all my hostas.  I'm upset about the Blue Angels on the side of the garage.  Huge sturdy leaves and a real mess.  These are a different variety and were affected too.

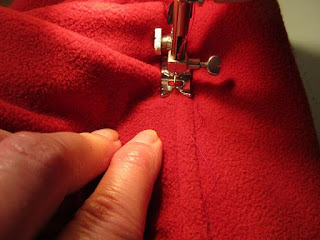
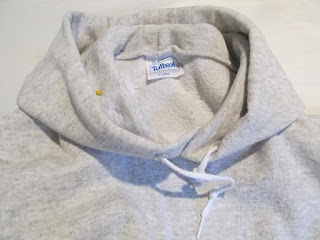
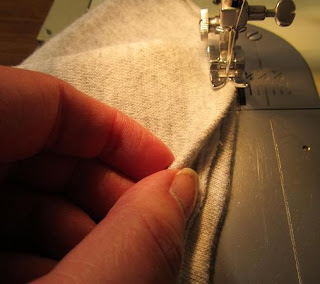
Another thing I've been working on is this....
The doors are done also.  I leave the back off so the interior is accessible for painting.  That's the part I do not enjoy.  After the dreaded sanding, I'll age the wood and then paint a light tan under a darker blue.   Trying to make a piece look peeled and old is not easy for me but when it's done, I'll show you how it came out.
 
I have a few photos of cats.  First off is Junior (real name is Nitwit) taking a snooze on my swing.  He just loves getting up on the rocker or the swing and rolling to make it move.  Odd for a cat, but that's why we call him Nitwit.

My brother kept 5 from the stray litters of prior years and  it's starting again.  He can't afford to keep having all these strays neutered, nor can he keep them all.  His neighbors are not animal lovers at any level and don't help, nor do they want any more cats around their yards.
  This little girl appeared and she is less than a year old, skin and bones, and probably pregnant.  Lovable, very affectionate, and sociable. 
One of the strays he kept is very odd looking.  When she's in the driveway, cars slow down and look, not knowing for sure what she is.
Her long hair is so thick and full, she looks like a circular brush on legs.  He just finished combing her in this photo so it's a little tamed.  What's also odd is her legs which are WAY too short, with only about 2" visible when she is standing.    She is over two years old and from the very first stray litter.  Her name is Peanut.
She and her siblings love the new little girl and my brother is upset about this starting again.  He knows of a farm that will take her but this guy does nothing but put food out in the barn and she will be alone.  She's too sweet and affectionate to be a lonely barn cat and he doesn't spay his pets either.
A note for Tina - I can't reply to your question about the Simply Samplers design since you have a no-reply setting, but doing a search on Google would be the best way to locate Hannah Gibson.
That's all I have to report!  Hope everyone is doing well - stay safe and enjoy your week.
Thank you very much for sticking with me and Lucy.  The end is coming!


May 3, 2012

Collar your hoodie - the end!

Good day to you.  This is the last episode of "Get this fricking thing off my neck" in the series "Things I can't wear since menopause".  This was my first attempt at a zippered front and I will make some changes for the others.  First off, each one of the four I plan on changing is different.  One will need to have the back seam of the hood taken in slightly in order to achieve an even front.  Regardless, I will wear them now.  They aren't wool blazers, they are sweatshirts, so I wasn't too concerned about the finishing, but I think they are pretty neat looking for former hoodies.
Start off with folding the hood down inside, leaving several inches for the collar, and pin the back center seam of the hood to the neck. 

Then keep smoothing and pinning as you go along toward the front, working only one side. 

When it looks good, use a fabric marker and run it along the neck seam, remove the pins, and do the same to the other side.


After marking, lay the hood on its side, lining up the neck seam, and pin your mark.  Look at the other side and see if the pins are close to that line.


Mine wasn't, so I moved the pins to be between the two side's lines, splitting the difference, which was even enough for me.  If you need to do this, erase the old mark and make a new one along the moved pins. 

 Take the pins out and open the hood, measuring (or eyeballing) the lines from that top center seam to see if they appear even.  They did!! 
 

I should have done this inside out so the marks would be on the inside, making it easy to sew on the double fold bias tape before cutting, but I didn't,

so I just cut off the hood at the line, and encased the raw edge into the tape.  Cut the bias tape longer than needed, fold over on the edges, and this is what it looks like with that step completed.


Now I folded over the collar, pinned the tape just below the neck seam, and sewed on the outside just below the neck seam. 
Done.  I don't know if it will be this large on the next one, and I am thinking of doing a stand up collar instead.   I'm not too happy with the seam binding showing at the front edge and may line the top front corner with the fabric from the hood's top, or angle those front inside corners slightly. 

The ties are still working so here it is gathered a little and also the back.


Looky here - two baskets I grabbed at Pat Catan's for $6 each.  LOVE them.  I'm a Gemini and usually buy two when I find something I like.  I also got 3 galvanized tubs at the flea market for $15 total.

Perfect for hanging from the stair railing.


Finally....Lucy. 
What a test of my patience.  Really putting me into a slump.  I was so excited about doing the smalls I have waiting, but I'm really getting discouraged.  I know that if I put her down, she will never be finished.  The vase had to be removed and redone because I messed up the right handle and counted over from it, making everything way off.  I quit the stems for a while and decided to run the bottom border so I can line up a house and start mindless stitching for a while.  When I see all the gorgeous samplers with lots of motifs and such, I am more convinced now that they will not be in my future.  I have many plus sized girls kitted and waiting, but they will need a second look.  Maybe the problem is just with Lucy, who had many many misaligned stitches.   Usually I follow a repetitive stitch or border without checking the chart and that was not a good idea with this design. I really love it and the colors ~ the errors have been my fault.  I'm sure I will attempt another after doing a bunch of smalls, but I also have many medium sized charts that I will enjoy. 
That's all I have! 
Thanks for visiting and have a great weekend.

Apr 30, 2012

Collar your hoodie #2 - unlined pullover

Hi all.  I don't know if anyone is really interested in getting rid of their hoods, but I will post the other methods anyway!  These pullover types are nice but I'm strangling myself when I have a flash, trying to pull it away.  This one is the fleece fleece - same on both sides - very soft and stretchy and doesn't ravel.
  
 First off, push the hood down inside the neck leaving about 2" in the back and 3" in the front standing.  Pin all around, trying to get a smooth fold with no pulling. 
Just keep repinning - it will eventually smooth out, adjusting the collar height as you go along. You can slit the top of the hood open if it helps, or not, in case you change your mind about the project.  Fold the shirt in half to see if the collar is the same height on both sides, or measure, and make sure the front edges match.  Now you have two options.  You can sew it as is, or add the masking tape to help with stretching.  I used a fabric marker to show you where the tape would be placed, which is directly above the taped neck seam that you can feel through the fabric. 


Pinning all the way around the neck on the outside of the shirt is really good enough.
You absolutely need to use the stretch stitch setting on your machine for the sewing. 


You will stitch in the ditch of the neck seam on the outside of the shirt, and also run a second row right over the topstitching.  This is a stand up collar so it's important to take your time stitching these two rows and following the lines already there.  Once you've completed the ditch stitching, move your pins to below the topstitching to prevent stretching, and complete that row of sewing.  If you're concerned about stretching and pulling, start from the back center and work towards the front edge on each side, and reduce presser foot tension.

Once both rows are sewn, remove all the pins and cut off the excess.  My grommets were not attached evenly which wasn't noticeable with the hood.  This time I took the ties out but will now insert them and make a larger knot so it's not noticeable.


This collar does not come all the way to the front edge inside, which is why I turned it into a standing collar instead of folded over.  You can see the finished stitching at the neck's back.  I'm now working on the zippered jacket hoodie, which I never did before.  I dislike them more than the pullover and am anxious to see how they come out.
Still stitching Lucy and still making errors but most can be incorporated.  The floral design is all over the place so there is no reason to remove and re-do.  I ran into one of the long closed needlework shop owners and it was so nice to see her.  See was surprised that I was stitching again and I was surprised that she isn't!  My landscaper is 5 weeks past due, two contractors never showed up, and the custom kitchen man was to call two weeks ago.  Typical.   Tomorrow (or Wednesday) will be the last boring post about hoodies and I hope to have Lucy progress to show.
Have a great day!

Apr 29, 2012

Collar your hoodie #1- the lined pullover


Hiya.  This post is about turning your lined hoodie into a collar.  Keep in mind, I have no patience so measuring, precise seams, and finesse, are not a concern of mine.   These sweats are for working outside and I just wanted to get rid of the bulk on a few. 

 
There will be three separate posts because of the amount of photos and different style hoods.  The first is the easiest of all - the lined hood.   Turn the hood down to the shirt and pin along the entire area to see how wide you want the collar.   The front throat area is always cut lower than the back so that area will be longer, which is why you can't just use one measurement all the way around.


Start at the back seam and work towards the front edges.  You can cut the very top seam of the hood open if it helps.  Every shirt is different and should be checked like this, but I didn't since I've done this before. 


  I measured the center back of a jacket collar to come up with my width.  Pinned the two layers of the hood fabric together (outside and lining) to make sure it didn't shift and turned the shirt inside out.  Matching front edges I laid the hood on its side smoothing it out.  I measured out from the center back seam, using masking tape as the guide.  The tape edge closest to the neck will be where the collar ends, the edge toward the hood's top will be where you sew.
When running the tape straight, you'll see that the front edge of the hood will have a wider collar measurement since the neck area is cut lower on the shirt.  Fold the piece in half and check to see if the tape lines up so you know your front edges will be even.  This is real professional, isn't it?


Take a look at the overall line and measure from the shoulder seam to the tape on each side to see if they are even.  Close enough?  Moving on.  Stitch a seam right along the outside edge of the tape, which would be toward the top of the hood, not the body of the shirt. 


Now you can cut off the hood top from the stitching line and remove the pins.

Here's the only place that has a snag.  The back seam of this hood was stitched to the lining and I needed to open that seam in order to pull the two layers apart.  I just clipped it open enough for this next step, which is pushing the seam up into the collar. 
Try to keep the seam in the center and then pin the edges shut, encasing it completely.  Having this fold a little longer on the top side of the collar, and less on the bottom, will make it lay nicer.  I didn't care.  But I did fold the collar down (like it will be worn) and checked to make sure I didn't have one side of the fold pulled tighter creating an uneven edge. 
Just make sure they meet as you're sewing.  You can leave it as is, or run another line of stitching up from the edge, which makes a little padded detail because of the seam that's stuffed inside.
 
TA-DA!
You now have a collared pullover sweatshirt.  Another way I've done this was instead of pushing the seam inside, I used quilt binding (or double fold bias tape) to encase the sewn edge and match the fabric appliques I added to cover the stains embellish the shirt, or used the same fabric as the appliques.  Running it along the front edges hides the grommets too.  I didn't bother pulling out the cords - you can - or not.  If you're concerned about the collar not being wide enough, tape and sew out a little further than you planned.  You can always sew another seam in closer to make it smaller if need be.   This fabric was fleece lined knit, not the fuzzy fleece that is the same on both sides.  That's the next one, with a stand up collar.  I hope this isn't too confusing.  It's really simple and once you play around with the hood and get it to lay properly before stitching, you'll see what will work the best.  The tape is not only a guide, but also to keep it from stretching as you sew.  Part #2 later!!


Apr 28, 2012

My blue stems and tablecloth curtains

Hi everyone.  Hope you had a good week and will be enjoying this weekend.  Just wanted to boast a little ~ I haven't taken a match to Lucy.  That's right.  She is a royal pain (but it's my fault) but unlike the old days when she would have been burned in the barrel, she is intact and just fine.  Except for being in shock over the cuss words that her young ears aren't accustomed to.  Here is the latest screw up of mine.  I told you about the darker and lighter x's as color symbols, but of course, I forgot about them and just went along my merry way.  The large floral design's stems and leaves and outlines were x's, and I had just completed a tan x section and continued on.  It never occurred to me that the stems could be blue, until I finally looked at the color photo. 
Yikes.  Damn.  I surprised myself and removed the entire design and started over.   It was a lot of time wasted, but I am determined to finish this project before moving on and can't wait to get to the houses.   They should be much quicker than this section.  I'm starting to see the end of the tunnel!
 I also wanted to show you my stained tablecloths.   There are always a few small spots on my tablecloths that seem to defy removal.  These are the homespun 100% heavy woven cotton type with fringe.  I decided to cut them to size and fringe the cut edge.   Using a small nail, I just poke the fabric over it, and use jute to make a tie back.  The small stains aren't noticeable at all and being 100% cotton, they can easily be bleached out or dyed.  They are pretty reasonable to purchase new for a heavy curtain if you like this style, or put your old tablecloths to good use.  If you prefer just a valance, you could get several from one cloth.  For bathrooms, remove the tieback and the heavy fabric affords privacy.  You already know this, don't you.  Here's a beige that I bleached out, and a mustard/ivory pattern that is a 52x52 size and not cut down.
   

 Whenever I took Mom somewhere, right before we left she would ask "are you going to comb that hair?".  And when I would wash the curtains - I have others that are just hanging fringed fabric in a valance style - she would ask "are you ever going to buy real curtains and take down those rags?".  I didn't start stitching again until after she passed and I can just imagine what she would have said about the "aged" pieces!
Today I am turning my hoodies into regular collars.  I found a great deal in tall sizes so purchased several, but I hate hoodies.  The back pulls down, my shoulder bag always catches the hood, and I never use them anyway so I came up with a solution.  Next post, I'll show you the method, or a large fire.
Have a great weekend!  Stay safe ~ thank you for visiting!
Related Posts Plugin for WordPress, Blogger...