Nov 9, 2011

Methods to madness

Hello everyone.  I've been busy helping a friend who moved her mom to a nursing home, and working on fall chores while Mark has some time off work.  I'm getting back to finishing experiments, and confusing my well-worn menobrain.  This first one was very easy.  I couldn't decide what to do with this little guy and spotted a paper mache box, which led to this.


I just folded the bottom following a linen thread for straightness, and pressed.  Then I did one of the sides, laid it on the box lid along those pressed edges and folded and pressed the other two sides, matching the lid size.  Following the fold lines, I attached
the fabric to the lid using a double sided tacky fusible web, and pressed to adhere.  Once fused, I trimmed  the excess and used Liquid Stitch glue to adhere the cut edges to the lid edges.


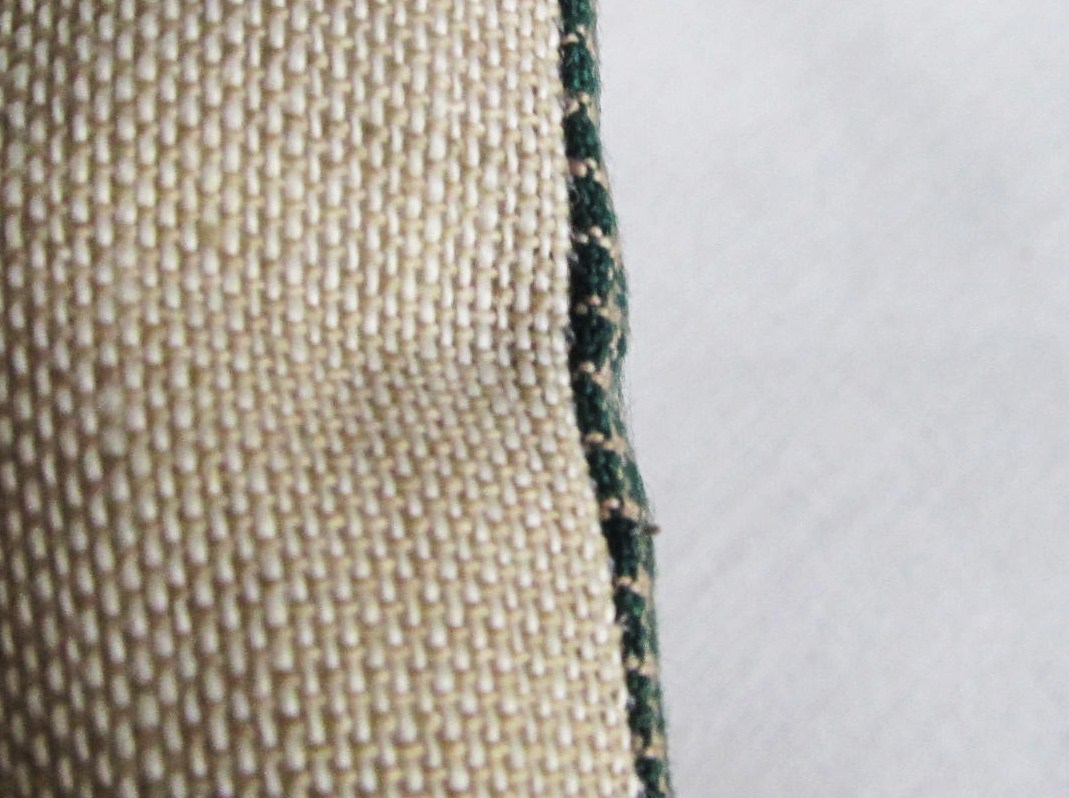
I probably should have trimmed it to the bottom of the lid's sides instead of half way down, but this was my first attempt.  I also could have been more careful and made the edge straight, but I wasn't thinking that far ahead.  The next step was to add a line of glue to the fabric and also the lid edge, and attach trim.  I used an odd shade of green grosgrain ribbon and ended by folding the raw edge diagonally.  To secure the end, I used a clip to hold it in place while the glue dried.  It looks a little bumpy in the photo but I hadn't yet smoothed over the ribbon to make good contact with the glue.

Done.  I've attached stitched pieces smaller than the lid size with frayed edges because I like a primitive look, but this was Jobelan and doesn't lend itself to that style.  The next experiment was a linen ornament, and I tried stuffing with no interfacing, and then fused the stiff facing to see the difference, if any.  Well, there wasn't much!  Without the facing, more stuffing was needed, and I don't care for that "star" appearance when the corners are out further than the fat middle.  Using the facing allowed for less stuffing and I prefer that flatter look.  I heard from several stitchers that the facing could cause a dent, being less pliable.   And here it is.
It's like the difference between plain paper and card stock.  Once it's dented or bent, the card stock won't smooth out but the lighter paper will.  Too much filling in the center first, can create side dents with the stiff facing.  I also heard from a stitcher that fused the interfacing 1/4" from the seam, and included it IN the seam which she said creates a very nice smooth edge.  That certainly makes sense.  Need to try that next!
So there are pros and cons to using the stiff facing, and it depends on the look you want.  It doesn't lend itself to primitive style, walnut shells, sawdust, beans, etc.  Smaller pieces needing structure, or creating a less puffy piece benefits the most from the stiffness.  I remember seeing a tutorial for a mattress style pincushion and her finishing technique HERE which could be adapted to a front and back piece without the middle strip.  Yet again, another finishing method!  It requires backstitching, and then hand stitching all four sides closed.  She has one of the most fabulous blogs and if you haven't seen Cote Passions, please take a look at her albums on the left side of her blog.  Such wonderful photos and projects.  You can find her entire blog HERE.
        I also finished Vonna's scissor keep, painting and distressing in a barn red.  Thank you again Vonna for such a great idea and project!
 I started BOAF's Red Santa and I'm enjoying these little designs.  I love the linen I'm using and I sure wish I knew its name!


And finally, Junior has been making more appearances.  He is a clone of his dad and wants to follow him everywhere.  Dad is always looking out for them and it's rare if he and mom aren't together.
These cat houses are the styrofoam coolers that we always have for strays providing warmth and protection.  We have a temporary shed roof to keep out the rain, and duct tape on the cut opening because junior seems to love tearing it up!  Poor little one has no siblings for playtime and is alone most of the day while the adults roam in the woods.   Junior attacks mom and dad whenever possible and hides as soon as he sees me. 
So that's it folks.  Between bleaching, dying, shrinking, gluing, ironing, fusing, sewing, and stuffing experiments, I'm not getting much stitching done.  But I think it's worth it since I have so many finishes to do, and why should I keep completing projects and putting them in a box?  Once I know what I prefer and which method is appropriate for that look, I can complete and enjoy my projects.  So I will continue trying the methods I find online, the tips I'm receiving from readers, my own made up attempts, and will hopefully learn which is most attractive and professional looking for my level of finishing.  Until then, wish me luck!  Thank you so much for reading and all your help and suggestions.  It's greatly appreciated.  Finish off your week with good days and sunshine.  Talk to you soon!

Nov 3, 2011

Finishing a freebie!

Hello people!    I'm still playing with interfacing and decided to try a shape without corners.  Since I don't have any - that I can find or remember stitching - I made one up.  And guess what?  I don't like it.  I used Jobelan for the project as a test for the Santa ornaments.   I would have much preferred one floss color for the alphabet on an unusual linen color.  And after all my bleaching and dyeing - I have that!    Instead, I picked five fall colors on sage Jobelan that was later coffee stained. 

I'm going to post the chart and template at the end of the post if you would like to stitch the pear.  If you don't want to be bored through my photos and routine instructions, just scroll down.   Blogger has changed the format when you click on a photo but you can still right click to print or "save as" when the new page opens.
*******
Please understand that posts sharing my experiments or trials certainly are not meant to imply that you need my advice or that I know it all.  After 25 years, I'm learning again, and dragging you down with me!  I get emails from readers asking for more clear information on subjects, as well as emails telling me the mistakes I am making, or suggestions to help.  So I'm learning from you while I'm sharing my progress.   
*******
    After I stitched the piece, I used a marker and just followed the outline at least an inch from the stitches on one side.  Folding it exactly in half and then cutting on the outline gave me evenly matched sides, then stitched right sides together to a piece of felt. 

I used my presser foot as an edge guide and I could have sewn in a little further for a smaller piece.  Now to cut the facing.  


I placed the pear over the facing and used a thick needle to pierce through the seam, poking holes in the facing beneath.  You then have a perforated outline to trace, fold, and cut.  I had trouble seeing the holes so I placed a dark fabric beneath.  Minor adjustments and cuts were made to fit inside. 

 After pressing the Decor Bond, I decided to hem it a little higher and had no problem pulling the facing off the fabric a little and cutting more off.  If you need to make an adjustment, reheating with the iron will allow the facing to be lifted, repositioned, or cut.  Pressed the seams open and turned it out.  No facing on the felt, it stood by itself, and held the shape nicely.  

I'm using quilt batting again instead of the loose fill and just cut to fit the shape.  Pretty easy finish once again!  Now I'm anxious to see how both coarse and fine linen work.  I did finally get a silicone finger to prevent burns when ironing seams open and it worked fine.  (And hid the crooked bumpy joint.)


 So here's the chart if you would like to stitch the pear shape along with the template.  I had a heck of a time trying to get this to scan properly.  Click on the chart/template, then right click and hit print and it should print the correct size.  If not, try "save as".   I must have used half a ream of paper testing the copies and scans but I did get a nice fire out of the deal.   I'll test again once it's posted and if it doesn't work, I'll try again.  Your seam will be stitched inside the template, width depending on your seam guide.  Don't forget to add a little rolled piece of felt/wool for the stem, or a real one!  Add the little leaf and there you go.  I think I will stitch one on my saffron linen, a greenish shade, and a darker brown, all different thread counts.  Several sizes and colors in a display might look pretty darn nice.  And if not, they'll make a nice hostess or exchange gift. 
Hope you like this little freebie!!!  
Thanks for the visit.
Oh!  One more thing.  If you're a Yankee Candle fan, they are having a buy 2 get 2 free offer on their large jars and tumblers.  Go to their website and use code CATH211 or I can email a coupon to use in participating stores.  Great holiday gifts for a good price!


Oct 31, 2011

Finishing just got a lot easier

Hey all.  I was anxious to try the tip I received from Donna (from yesterday's post) so I purchased two interfacings that felt the most stiff.    As soon as I came home, dried off from a massive soaking, and ate most of the Halloween candy, I went to work.   And by the way....hot flash is no longer correct.  Flash defines as quick and temporary.  No no.  These are drawn out endurance matches between every pore above the waist.  Including eyebrows.   On to sewing.  Eureka!!!  This may be old stuff to you but bear with me - I don't get excited often.  I need to bake something for Donna when I take my blazers to her.  Her advice made it so much easier, neater, and quicker.  I'm certainly going to give it a go myself and see how the other fabrics work.  Here's a recap of what I did.  I used an old piece on Aida, stitched right sides together on three sides following the fabric threads. 
Then I cut a piece of the fusible interfacing to fit directly inside the stitched seam and ironed the corner to secure. 


The other side was folded along the stitched seam line and then cut along the fold.    It's quicker and more accurate than measuring. The open bottom end facing should be cut to where the seam should be, and the fabric can be pressed up over it for a neat finish, ready to be hand sewn closed. 


Once the cuts were made, the facing was pressed and fused to the stitched fabric and also the backing fabric.  I pressed the seam allowances open on all three sides which really gives a crisp seam, and clipped the corners, adding a drop of fabric glue to the edges, which isn't really necessary.   When I turned it right side out I was amazed.

I always used a pin on the backing fabric to pull the corners out and with the facing, it made it easier.  What a difference compared to when I fused lighter interfacing to the whole piece. 
The bottom edges are pressed with a perfect straight edge, ready to be sewn, and stuffing this cavern was even easier!  I didn't need as much and my corners were already good so there was no poking and prodding.
The piece actually stood by itself, crisp as could be, before it was even filled.  
 So here is the ornament, ready to be stitched close in record time without the aggravation.  I used to stitch across the bottom corners and leave an opening to turn and stuff, but this is so much easier.  I imagine I could follow this method without stitching back to front.  Just fuse and turn the seams in on each piece, and then hand sew shut on four sides, even attaching trim at the same time.   This Aida was fused with the Craft Fuse #808 from Pellon, and Decor Bond #809 on a lighter fabric.   Both of these worked very well.


As usual, you probably already know this!   But I have to say I'm thrilled to discover this now.  Thank goodness I asked her!  I don't think it's a fluke that these test pieces came out so well and I'm expecting my Santas and other projects to finish as nicely.   Jobelan is the Santa ornament fabric that I will be working on next and I doubt if I have any scraps left to test.  I'm confident enough to just use the stitched piece.  Hopefully, you'll be seeing a bunch of ornaments looking pretty fine!!!   As I type this, Woody Wood****** is bringing in pieces of straw to the hole he just drilled, even though it's only as deep as the siding and not big enough to get in.  I'm not sure what will break first - the window I keep pounding on or the fist pounding it.  
Have a good week!  Thanks for reading!! 

Oct 30, 2011

Decision, change, finish!

Hello everyone.  I finished the Redware design and have been screwing around with trying to finish it ever since.  I didn't like any of the red fabrics because they didn't seem to make these beautiful colors pop.  So I tried a dark brown sueded piece and although there isn't any dark brown in the design, I loved it. 
Then I found the large rick rack in a color called carrot, and it matched the floss perfectly.  But I'm not a rick rack girl.  Been there, done that, changed it.  "Stick with what you like!"  So the rack is for another project, but I still like the dark brown.  I used it for the backing along with leather lacing for the strap.
Wasn't happy.  I felt it needed to be bordered by the brown and framing it would have been the way to go.  Too late. 
 So I took it apart and went with my original choice.   I didn't know if I should use a light or dark lining.


When I spotted the hanging Nash design, I realized that the darker linen I used did nothing to show the wonderful thread colors.  So I chose the lighter and ended up with this, not knowing if I will attach the hanger.
I needed to make an appointment with my seamstress to tailor several blazers and asked her about finishing small pillows/ornaments.   I'm going to take them along for my visit, but I doubt if she will be interested.  She gave me a few tips during the conversation and will certainly be more helpful in person.    Most important she said, is to use a very stiff interfacing to fit directly inside the seam, not in it, to create a crisp edge and smooth face.  The stuffing is then not the determining factor in shape, especially in the corners. The one I use gives body but doesn't really hold or create shape.  I hope to get more tips from her, and I'm sure I could find several methods on the web.   Following a professional's advice, may save some time.  What would really save time is her agreeing to sew them!  I've finished smalls using different methods but I would like to learn a technique that makes it easier and neater.
Lucy received a few more stitches and I'm picking a new project.  Either a small sampler from Scarlet Letter or Coverlet Birds from Scarlett House.  I saw Sampler Farmer's new Webshots and really liked Heartstring's Harry Tyler's Lion.  It's funny how a chart doesn't hit you when seeing it online, but snaps your socks when you view it stitched.   It's now on my list.  The new list.  I can't find the other.  I hope to finally get all these charts scanned and listed on Ebay.  I don't know what's worse - the computer problems, the scanner failures, or the return of the flashes.   If this continues another couple of days, leaves won't be the only things burning. 
Have a good week, and I hope the bug that's going around bypasses you and loved ones.  Thanks for visiting!


Oct 23, 2011

Shades of red, oldies, and goodies

Welcome!  The sun is out!  Of course it won't last but I'm taking advantage of it and working outside today.  It won't be easy with the brace but I'll give it my best effort. 
I'm loving this PA Redware from Carriage House.   What I didn't realize was the color similarity to my persimmon linen.  DMC's 3777 is almost exactly the original color, which is now toned to a beautiful shade which also matches well.   I'm thinking of looking for another Redware inspired design to do in reverse colors on it.  

 I haven't worked on Lucy since removing her from the frame ... still too difficult to hold that much fabric.  I'm surprised that my wrist/thumb isn't much better even though this is very restrictive.
 We made a stop at my favorite James Creek Galleries yesterday and I found so many items I would like.  Wool pumpkins, gourds made into acorns, beeswax items, lots of goodies.  I came home with this small wall shelf.  The old book on it is etiquette from the late 1800's on speech, Womankind, young people, dress, personal habits, and public.  The entire book begins every paragraph or rule with "don't".  Very interesting.

We also visited another store where I purchased the two fabric pieces in the bottom shelf, and these candle jar holders for attaching to the wall.  I got two of the heavy solid holders - LOVE them.  And I bought the open strap holder for my sister.  I already have this style and it certainly is handy when kids or cats are around.  They also come in the small and medium size but I always buy the large jars. 
This little old box was found in my husband's grandfather's basement years ago.  Another blast from the past, made in Pittsburgh.  Interesting to see the directions in different languages for the immigrants, which all of our grandparents were.

                                                                                                                                                                                                    And last in another boring post with only a small project related to stitching, is what I found in a box upstairs when I added green Santa.  It's my to be finished pile.  Glenna made a statement that was very eye opening to me and two words said it all.  Indecision=paralysis.  Absolutely. 
There is no doubt I am a procrastinator, but most items sit because I can't make a decision on fabric, piping, trim, stuffing, etc.  I realize now that this is my bigger problem so I'm still kitting projects to prevent that stitching lull when choosing a new start.   It takes a while to decide on supplies, but once done, there is no hesitation nor reason to delay stitching.
I'm heading outside now and the sun is gone already.  Our leaves are strange this year.  We have completely bare, colored, and still green, all at the same time.  
 Enjoy the week and thank you for visiting!

Oct 18, 2011

Linen.......again!

ADDED NOTE - Blogger has whacked out and showed me 5 times that this has published.  If you keep getting the same thing - sorry - don't know what's going on. 
Hi people.  Thanks for your kind words about my hand.  It's really not a big deal, but is continuing to put a damper on stitching.  Not because the healing is slow, but because the little brat mama is square dancing in and out of my legs and I tripped over her.  I didn't fall.  My right hand prevented that!  Back to the wrist brace for a few days. 

I started stitching a small and very easy project - Pennsylvania Redware from Carriage House.


Random Thoughts from Sheepish Designs was started too but I didn't like the colors and pulled others.   32 count was my choice for the project and I found that I hadn't bleached, dyed, bleached, dyed, bleached, dyed, or set on fire, that particular count in the cheaper linen.  So.  I did.  
Yes it is cheap, thick, and nubby.  For primitive pincushions and ornaments, it's great.  You can find it at Michael's craft store, and using their 40% or 50% off coupons from their website or flier, it's around $5-6 for a 20 x 27 piece.   It's not for a beautiful sampler.  You can see that this unbleached has a gray tone (also comes in ivory), and the piece beneath is after I worked on it.  It comes out of the dryer thick and soft, and 19" x 24 1/2".  Quite a bit of shrinkage.

Here's a better picture of how it is now.   A warm tan and a tighter weave compared to the original on the left.

I also did a few pieces of 26/27 count and here's an example of why I can't give a definitive answer when emailed about how long to leave fabric in the bleach water.

The 26 was dipped and squished for about 30 seconds and the 27 count was left in for 15 minutes and still didn't lighten.  Having the same selvage I thought they would be the same linen but obviously not.    I started putting the count in the edge with markers that won't fade or run.   I've only found one article on linen regarding thread thickness and such by name but I can't find it.  WHAT??  A decent article can be found here An article with old photos and wonderful drawings depicting  linen from seed to cloth is here 
This was after the first bleach and dry of the 32 count, now a lighter gray.  The dryer's ball of edge threads are from 5 pieces of linen that will be saved and used to stitch edges closed or trims.   Sure some of the difference in size is because of losing a few raveling threads, but no where near even a 1/2", let alone 2" or more.     I mentioned before about using Rit's dark green liquid dye to take the pink tones out of linens, and this is the green in my sink.  All it takes is a drop or two of the green dye, and a quick dip or two and it tones the red to brown.
I wanted to mention last post about Vonna's fabulous creations that you've probably already seen, but in case you haven't check this out.  I have got to make the scissors holder for sure.  Now I remember why I have been visiting my craft store and wandering aimlessly.  The strong urge to recreate her design was pulling me there, but the brain wasn't on board.  I'll write it down.
 My hot flashes are continuing to change.  Instead of several small, a few massive, and constant mediums, I'm now having less, but it appears they have combined and are beauts.   The same thing is happening to my eyebrows, or what's left of them.    It seems the fine and medium hairs have left, banded together in a show of solidarity, and came back as one that can be seen from across a room and stab you if you get too close.  I have several of these now and could probably drill a hole in one end and use it as a needle.   Plucking these twigs is painful since I swear they are attached to the skull.

And here's the other kitty.  He (?) has damage to one of his beautiful eyes which doesn't seem to dilate at all.   I can pet him and was able to remove his filthy old flea collar.  He eats as fast as he can while turning his head constantly, looking for dad or Buddy as we call him now.  I can't tell if he still has his walnuts because of the long hair, but he is so afraid of being beat up and certainly not wanting to engage in territorial debates.  Mama shows affection, rubs my legs and hands, rolls and plays, and then draws blood.   Hub said he didn't know a young nursing mother could also be maniacal menopausal.

This wraps up the final episode of As the Linen Tweaks.  This time I really mean it.  I'm done.  There is one piece and a few scraps left to change but only if I plan to use them.   So have a great week, thanks for reading and commenting.....oh crap.  I hear him.  Woody Wood******.  We can't see him outside but hear the pecking so I think he may have somehow got into the chimney or attic.  On the bright side, I can get a lot of stitching done sitting around in a jail cell all day.  Are you allowed needles?  HEY!!  Those eyebrow twigs will come in handy. 


Related Posts Plugin for WordPress, Blogger...