Showing posts sorted by date for query finishing a pear. Sort by relevance Show all posts

Apr 28, 2014

Well...duh!

Greetings.  Didn't tell you when the drawing will be did I?  Since I am feeling better today and half of my mind is back, how about Wednesday at 8 pm EST?  I guess there are some readers who can't leave a comment, so just click the email button at the top right and I will add you.
Many have stated that they are concerned about finishing the pears.  Try the pattern on fabric scraps first.  My older post Finishing a pear plus the template shows my method, which may not be the best, but it worked for me.  Here's the template again, and it's also at the bottom of the Pears page.
You would think that scanning something this simple would be a sharp image, but not on this HP.  Open this in Windows Live Photo Gallery and choose full page to print.  You can sew in further at the top and outward on the hips to exaggerate or create the shape you want.  Enlarge on a copier if needed.  I think the biggest help is the fusible interfacing which holds the shape very well, clipping the seams, and definitely pressing the seams open before clipping.  The bottom bends gets bunched when turned and I use a very wide V to trim excess here, fabric glue to close.
Right now, I am waiting for Dominic to deliver the two large cabinets that we can't fit in the SUV.  I have a jar of my hot pepper butter and some chocolate for him.  So grateful he came through for us in short order.  The pepper butter is hot, and dark chocolate calms the burn.  Wait - he's here. 
--------------------
I'm back.  The cabinets aren't right.  He pulled out my DETAILED drawing, and saw that he was wrong.  Whatever it is, it is. Mark and I will try to add the missing center stiles, but nothing we can do about the legs.  I opened the tightly wrapped doors from the cabinet company and see one miter that is open, another is half open, two rails are cracked.  Life is good - get over it.
Time to hit the Dove bags!!

Aug 2, 2013

Goodbye final pear!

Hi everyone.  After having to enter all the names THREE times into Random's list randomizer, they finally were scrambled, and the number that was generated belonged to C.M. Designs.  I have your email and will contact you this evening for your address.  And so ends the pears, with the final one leaving home.  I guess I'll have to stitch it again if I want the complete set.  Or maybe give the rest away?  I'll have empty bowl syndrome!  But I'll get over it.  Stay tuned!
 
Karen of Karen's Handiwork has stitched my pears and I showed them before. Since then she has added a few more. Check out the bushel of pears post to see her fabulous finishing.
 
I was busy with needle today but it was beans that I was sewing.  I'm attempting a string bean garland or leather britches as they are sometimes called.  I don't know why.  I'll show you how I did it and I'll post the drying process if any of you are interested in making one.
 
Again, thank you so much for participating.
Have a great weekend and stay safe!!
 
xxxxxxxxxxxxxxxxxxxxxxxxx


Jun 25, 2013

Checking in

Hi all.  I've been working on the pear for July and I'm sure you know by now that I continually change things.  I really thought this would not be the case for XI, but colors and placement took most of two days.  By the time I finished, we had heavy rains and darkness so I couldn't take a good photo of the fabulous birthday gift from Miss Shirlee.  Tomorrow for sure.  I will have a few tags then too. 
 
I do want to show you how close I came to the linen's left edge!  I stitched three pears all on the same piece of linen and didn't bother measuring.  Yes, I waste a lot of time but it's not until I see it finished that I realize a change is needed.  I used woven fusible facing this time, front and back.  Certainly helps prevent raveling.  I get a lot of emails about finishing the pears and using the template with the center line, held up against a light, is the best method.  This time I took a few photos of the seam pressing.  When you press the backing to the center, you can see where the bulk is and where the trimming should be.


I will be posting the chart as soon as I get it in the computer file, but here's what it looks like.  I'm really anxious to get back to Eliza, but I will have an even bigger house mess soon.  I SO love the new floss hanger.  It's always there, in order, and I don't know why I didn't think of it sooner.
Hope you're having a good week.  Thank you for the birthday wishes.  Unfortunately, my cousin did not come home.  They are fitting her leg with a brace and maybe next month it will happen.  Be back tomorrow.
Thanks for visiting!

Mar 27, 2013

Finishing a pear

 
Hi everyone.  I receive a lot of emails from stitchers about finishing the pear designs, so today I snapped a few while doing the latest.  Lots of boring photos in this post.  First off, here it is - pattern needs tweaked a little and I will post it this weekend.

 
I use the template that I originally posted with the first pear, on a bright color cardstock (so I can locate it). Whether it be square or shaped, I always fold my templates to make sure they are the same each side, and then mark the fold in black.  Depending on the pear size, I resize it on the copier.  After fusing the interfacing to the linen and the backing fabric, I hold the linen up to a window with the template on the backside. 

 
You can see the center line through the linen which helps a lot.  Two pins to hold it, and then I use a chalk pencil to outline right onto the interfacing.  This is NOT the cut line, but the stitching guide.  Some times I go a little over since I can always go back to make it a little smaller.  I always use basting 8-10 stitches/inch to make it easier to remove if necessary and it holds with the interfacing very well. 


Turn it right side out to check the shape and then either sew it in further or remove the stitching to make it larger (that has never happened), or hopefully be perfectly pleased and no changes are needed!  Clip the seams and trim the excess fabric.

 
The bottom is folded and pressed as is the seam to open it.  I use a plastic letter opener to crisp the seams by sliding it between the backing and the seam allowance, never on the linen side. 


A smaller piece of cardstock is inserted (so the batting slides easily) and after cutting the batting smaller than the original template, slid inside to fit the shape. If I use Mylar to hold the shape, it's cut slightly smaller than the pear and kept in.  For a flatter pear, one layer of the thickest batt, but usually it's two, one on each side of the paper.  It's easy to insert the stem between the batting through the top opening now, while the paper is separating the two.  Remove the paper and fold the fabrics over the batting. 
 
 The bottom is usually wonky and I open the seam where necessary and hand stitch or glue to shape and close.  A little strip of additional batting is sometimes needed here.  Done.


I'm sorry I haven't been reading blogs or responding to comments.  I have so much going on right now and my head is spinning, unfortunately in the opposite direction that I would like.   When I was getting quotes for home owner's insurance, I told the agent that we are classed as a Type 2 alarm system.  She asked what we have - I replied a menopausal woman with a gun.  She laughed so hard she snorted.  I wasn't kidding.  The moods are raging!!!!
The chart for this will be posted in a few days and until then, stay safe, have happy thoughts, fabulous food, and good stitching!
Thank you for visiting!

Jan 25, 2013

Jobelan anyone?

Hi folks.   I want to throw my newly rebuilt laptop out the window into near zero temps.  The screen and half the keyboard are constantly freezing, so if that's what it wants, that's what it will get.  Literally frozen.  But before I do that, I'm pitching items I will never use.  These are the pieces needing a stitcher.
The Antique White is marked 32 and two others appear to be the same.
 32 count 18 x 28 piece Antique White
32 count 13 x 18 piece ivory/cream
32 count 18 x 28 piece of a color close to DMC 840 or 611
30 count 13 x 18 light gray/taupe Murano
Fairly sure these next two are 28.
28 count 13 x 18 piece Sage
28 count  9 x 27 Sage    
(The two sage are different dye lots)

If you are interested in this fabric pack, please leave a message on this post.  I'm assuming there will be more than one request so I will randomly choose a name Sunday evening at 8 pm EST.  If there's only one - good for you!  You can tell that they are from many years ago.  The price is still on the ant. white of $7.75 for 1/4 yard.  I think it's more than double now, but of course there's always Ebay.  This happens every time I start searching through the linens and that's fine - no sense keeping what I won't need.  I had a yard of Lugana and another yard of Jobelan and can't find either.  But I may have given them away and just can't remember.  There are about ten pieces of linen I plan to dye today, just because I don't like their current color.  I thought I was finished with dyeing and I should have learned my lesson by now.  But I have specific charts chosen for these so I'm giving myself a pass. 

Most of yesterday was taken up with errands and another trip for the final injections on the right leg.  But the rest was spent searching for the February pear.  I wanted to construct the finish and I tore the house apart, couldn't find it. 

Late last night it finally appeared, atop the cupboard that holds the seven different bags of cat food for three finicky cats. 
I have a very bad habit of setting things down when I'm distracted. I should wear a waist apron so I can stuff instead of set. I like this one from Home Depot.  Seriously.

Faye from Carolina Stitcher (http://carolinastitcher.blogspot.com/) stitched my Remembrance chart and will show her finishing soon.  I still can't list a link regardless of what I try. 


Between having to hit certain keys a dozen times and the backspace not working, I'm shutting this down for today before it really does fly out the window.
So leave your name if you'd like the Jobelan, stay warm, thank you for visiting!
xxxxxxxxxxxxxxxxxxxxxx

Oct 24, 2012

Dinner with gravy and pears for dessert - EDIT

Hello all.  Just wanted to show a few pears, a pear preview, and the recipes I mentioned.  I put the recipes in a jpg format so you can right click to save or print. 
Edited -Sorry!  I forgot the 1 tsp Paprika in the wine for the last recipe.  Copy is corrected.
 First off, Ariane from Les Petites Croix D'Ariane sent me this photo of her pear. She attached a charm to the top and hung it with ribbon - so sweet! And I pulled open my glued seam of the first pear with a little tug and re-seamed (new word) with additional stuffing. The finishing of Anneke (My Pretty Corner) that I showed in a prior post is what I tried to mimic but it's not quite as nice as hers, but better than I had originally sewn.


And this is a preview of what's coming the beginning of November.  Oh did that hurt.  November.  What the heck happened to October?  Or September?  The winter months better fly by as fast.


I'm waiting for my 8 new charts from Essamplaire and hoping they arrive in a few days.  I would have started a new project if it weren't for my changes to the pear.  Just like my kitchen design, I keep coming up with another layout or different color.  This one is the final, and of course, what I wanted in the beginning. 


The real pears are in need of cloves and starting to shrivel a bit so I better get to them tonight.  I've been asked quite a bit about making the dried studded pears and this is it.  Simple.  Bosc pears are all I've ever used, whole cloves, and leave a space between for shrinkage, usually a little less than the size of another clove.  Set them on wooden skewers in a plastic something-or-other and check every few days.  As they start to shrink, they become soft and you can sort of form them to shape, including flattening the bottom to sit properly.  At the same time, press in any cloves that are coming out.  It takes a while to dry completely so don't expect this to happen in a week or two.
Here's the two easy gravy recipes.  I've used a roast instead of the short ribs, but shorts are best.  Made the night before, you can put the liquid in the fridge overnight and remove all the congealed fat the next day.  If it doesn't work to click on the photos to print, I'll try again later.


   That's it boys and girls!   Gum surgery on the other side tomorrow so I'm packing my mouth with goodies tonight.  Hope you all have a great day. 
Welcome to new followers - thank you to all for visiting. 
Stay safe and stitch happy!
xxxxxxxxxxxxxxxxxxxxxx

Nov 3, 2011

Finishing a freebie!

Hello people!    I'm still playing with interfacing and decided to try a shape without corners.  Since I don't have any - that I can find or remember stitching - I made one up.  And guess what?  I don't like it.  I used Jobelan for the project as a test for the Santa ornaments.   I would have much preferred one floss color for the alphabet on an unusual linen color.  And after all my bleaching and dyeing - I have that!    Instead, I picked five fall colors on sage Jobelan that was later coffee stained. 

I'm going to post the chart and template at the end of the post if you would like to stitch the pear.  If you don't want to be bored through my photos and routine instructions, just scroll down.   Blogger has changed the format when you click on a photo but you can still right click to print or "save as" when the new page opens.
*******
Please understand that posts sharing my experiments or trials certainly are not meant to imply that you need my advice or that I know it all.  After 25 years, I'm learning again, and dragging you down with me!  I get emails from readers asking for more clear information on subjects, as well as emails telling me the mistakes I am making, or suggestions to help.  So I'm learning from you while I'm sharing my progress.   
*******
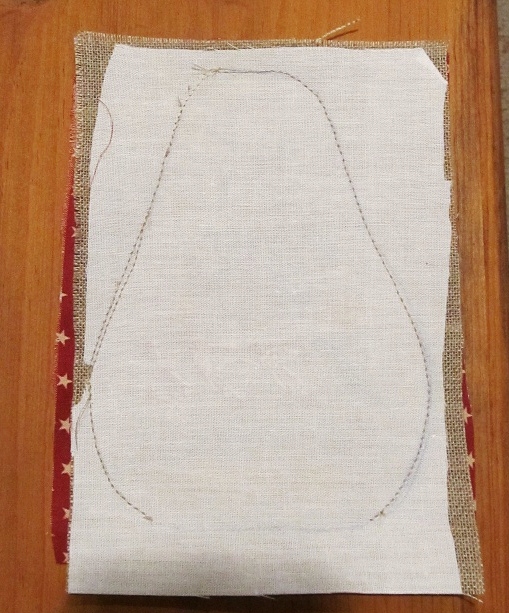
    After I stitched the piece, I used a marker and just followed the outline at least an inch from the stitches on one side.  Folding it exactly in half and then cutting on the outline gave me evenly matched sides, then stitched right sides together to a piece of felt. 

I used my presser foot as an edge guide and I could have sewn in a little further for a smaller piece.  Now to cut the facing.  


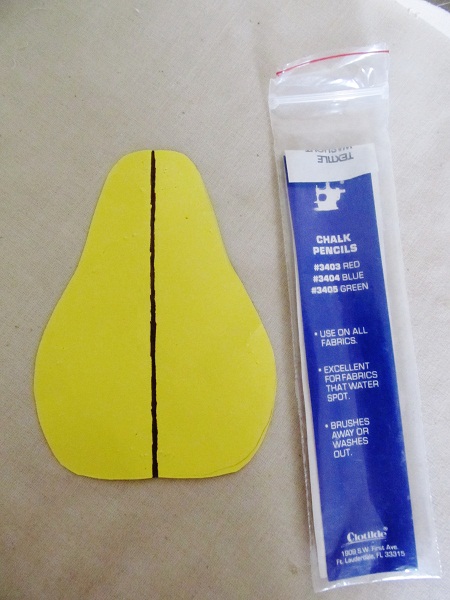
I placed the pear over the facing and used a thick needle to pierce through the seam, poking holes in the facing beneath.  You then have a perforated outline to trace, fold, and cut.  I had trouble seeing the holes so I placed a dark fabric beneath.  Minor adjustments and cuts were made to fit inside. 

 After pressing the Decor Bond, I decided to hem it a little higher and had no problem pulling the facing off the fabric a little and cutting more off.  If you need to make an adjustment, reheating with the iron will allow the facing to be lifted, repositioned, or cut.  Pressed the seams open and turned it out.  No facing on the felt, it stood by itself, and held the shape nicely.  

I'm using quilt batting again instead of the loose fill and just cut to fit the shape.  Pretty easy finish once again!  Now I'm anxious to see how both coarse and fine linen work.  I did finally get a silicone finger to prevent burns when ironing seams open and it worked fine.  (And hid the crooked bumpy joint.)


 So here's the chart if you would like to stitch the pear shape along with the template.  I had a heck of a time trying to get this to scan properly.  Click on the chart/template, then right click and hit print and it should print the correct size.  If not, try "save as".   I must have used half a ream of paper testing the copies and scans but I did get a nice fire out of the deal.   I'll test again once it's posted and if it doesn't work, I'll try again.  Your seam will be stitched inside the template, width depending on your seam guide.  Don't forget to add a little rolled piece of felt/wool for the stem, or a real one!  Add the little leaf and there you go.  I think I will stitch one on my saffron linen, a greenish shade, and a darker brown, all different thread counts.  Several sizes and colors in a display might look pretty darn nice.  And if not, they'll make a nice hostess or exchange gift. 
Hope you like this little freebie!!!  
Thanks for the visit.
Oh!  One more thing.  If you're a Yankee Candle fan, they are having a buy 2 get 2 free offer on their large jars and tumblers.  Go to their website and use code CATH211 or I can email a coupon to use in participating stores.  Great holiday gifts for a good price!


May 9, 2011

Third time is no charm

Hope everyone had a beautiful Mom's day.  We've had sunshine for a few days now with warmer temperatures and it's such a treat!  But this project is NOT.  I love it, I have done it no harm, and I'm setting it aside till this evening.  I ended up having to rip out the whole pear.  First, the top half only, then restitched, then removed the bottom half, restitched, then ripped out the entire pear and started over.  I would have let it go except for the fact that it was four stitches to the right of the design. ????  The basket and other pear would never have lined up.  I knew where I missed one in the stem, but it should have brought the pear to the left.  I went over this chart time and again, couldn't find it.    Since it was so far off, I had no choice, and I surprised myself once again by not tossing it.    In the process, I realized a lot of my counting errors were stitching errors.  The top part of the stitch was over two, but the bottoms, were over three.  The row beneath, I would just follow the upper stitches and unknowingly continue the error.   So instead of making good progress this weekend, I instead have a real neck problem!  Here's where I am now, with the two darners I found at the antique store..
I was trying to decide if I should order the matka as recommended for finishing this pocket, or use some of my LWAC (linen without a chart).  So here's Scarlet Letter's ????.  It was purchased over 20 years ago and it's hand dyed..... persimmon?

And this is just as old - SL's hand dyed saffron...


The saffron is darker than this photo and looks great, but I think I would prefer something in browns. Too soon to tell - need more of the design completed, especially the reds.  The persimmon is almost exactly the 918 but I don't know if it will be too strong.  None of my pictures show true colors and I have to play with them to get them close which neither of these are, so I bought a new camera.  A little Canon something or other that's still in the box.  The salesman told me it is the best for close ups, but I also want to zoom in on the Orioles and other bright birds in my yard.  The way the pears were going, I didn't think it was a good idea to break out a new camera and try to understand the instructions when I couldn't even count a few x's correctly.  I came across the amber linen when I pulled SL's out and I really don't like it, as I've already said several times.  When I don't like something, it's like I have to beat it to death, just can't let it go.  I don't like amber linen.   It just happened that I steamed and smashed this little pillow from my SIL yesterday, and wished I knew the linen color since I like it.  I checked my stash - it's amber.  I guess doing a 180  has become a habit.
 NEVER would have thought it could look this good when stitched!  So I guess you can't judge a linen by its color, until you see it in a finished piece.  Matches the little bear I stitched many years ago, and will never do again.  Isn't he sweet?  Look at that face!

I'm going to take 3 Advil now and when they kick in, go outside and plant my new tree.  In my yard, with 2 types of clay soil, I either dig a hole and it fills up with water, or I need a spud bar and pick to get through the dirt.  This area, spud bar and pick.  I usually do chores that aggravate my neck when it's already aggravated.  Why suffer twice?  Hope you're all having sunshine!

May 3, 2011

Welcome back Stacy

Hi everyone.   My Pears & Strawberries Sewing Bag is back!  I don't know if it has ever happened to you, but I looked in all my stitching boxes several times, for several days.  I found her in the box of silks and overdyed - not a lot in the box - easy to see since there are no layers of supplies - I even went through those silks for the Pears Two - SHE WASN'T THERE.  She couldn't have been.  How could you miss a chart in a bag amidst little skeins????  There is no one here except for hub, and he knows what happens if he touches my stuff so I know it wasn't him.  In fact, he doesn't even set foot in the tiny parlor where my charts and supplies reside.  The closest he comes is shutting the door of an upstairs bedroom, considered my craft room, when he can't take seeing the growing clutter. 


I decided to start the Nash since I removed all the stitching from Pears Two and counted those eye-crossing threads - it is 35/36 count.  My eyes seem to do this sideways dance for a second whenever I'm counting and it always happens right before I mark the thread.  I had planned on doing the Nash design before the Pear and before she disappears again, I opened and read the chart.  I didn't know this was inside...


Isn't that sweet?  What surprised me is the size of this project.  I thought this was going to be about 6" or so and it's much larger than that, over 9" wide for the design area, and I'm a little disappointed.   My perception must be way off or those little scissors aren't as little as I think they are.  Doesn't this look like a small bag in the photos?  Maybe she used 36 count originally which is why she states one strand of floss.  I am using the 32 count recommended which is one of the few pieces actually marked in my stash.  Although the linen count is correct, I'm not using one strand of floss as suggested.  I didn't like the coverage and one of the colors is too close to my linen to show up, so I redid all of that.  Between the Pear and this, I've done more removing than adding.  I've been making a lot of errors on the top border circles - can't seem to get that pattern memorized, but at least the errors are caught right away.  I can't wait to get to the fruit.  I found the chenille trim on EBay after searching the web for suppliers, which aren't many.  I didn't see it offered on the online shops so I'm not sure if it's the same, but how many chenille trims can there be??  I think it's one of those small items that you find when you actually visit,  which is why not having a shop is sad.  All I see are charts, linens, and thread, oh my!  I received the colors I ordered quickly, they are reasonable, and she was very nice so I'm happy.  Well, I was then.  So here's my progress...


I'm still going to give PearsTwo a try on the 35/36 with one strand, so I may be working on two projects at a time - a first for me.  I have quite a few CBU's (completed but unfinished) to sew into something including the little Blackbird design I recently finished.  I was thinking of doing a roll and offering it as a giveaway but it depends on how many flashes I have during finishing.  That's a huge factor in quality of workmanship, let alone a possible demise.  Haven't decided about Fanny - frame or not.  I saw a frame that made my skirt fly up on the Queen's webshots.  You know who I'm talking about -  SamplerFarmer!  Check out this frame on one of her latest entries.  Never saw a frame like that and my local doesn't have it.  She posted Jenny Bean, Mrs. Pearson, E. Traill, and Two Horses recently.  Hail Queen! 

 It's 9am right now and the rain is just pounding my house and this is how dark it is....We saw the sun two days in four weeks and the rain is relentless.  I need boots to walk this yard swamp just to feed my birds.  Oh wait - look what came to visit yesterday - bad picture I know - an Indigo Bunting!   He's in the top left.
I had the orange Baltimore Oriole, my red Cardinals, bright yellow Goldfinch, this bright blue Bunting, and my usual  Grosbeaks (my personal favorite).  Our black oil sunflower seed went from $16.99 for 50# to $26.99 in one shipment, and the next will be $29.99 we were told.  The Grosbeaks (the guy on the right) are tearing into suet cages so hopefully that won't be rising too.

I hope you all have been safe and not affected by the ravaging storms. We had the May 1985 F5 tornado pass right below our home, and take our best friend while he saved two children.  Pictures on the screens don't come close to experiencing in person the shock and disbelief of the devastation that can occur in a matter of minutes.  Hopefully, better weather is on the way.  After the long white winter, we're having a dark wet spring!  As long as our loved ones are safe, I guess the weather really doesn't matter.  Puts things in perspective doesn't it?  
Related Posts Plugin for WordPress, Blogger...